Unit Assembly
Required Components for BeamPro Setup
- BeamPro Head
- BeamPro Base
- BeamPro Charging Dock
- Dock Power Cable
- USB Keyboard
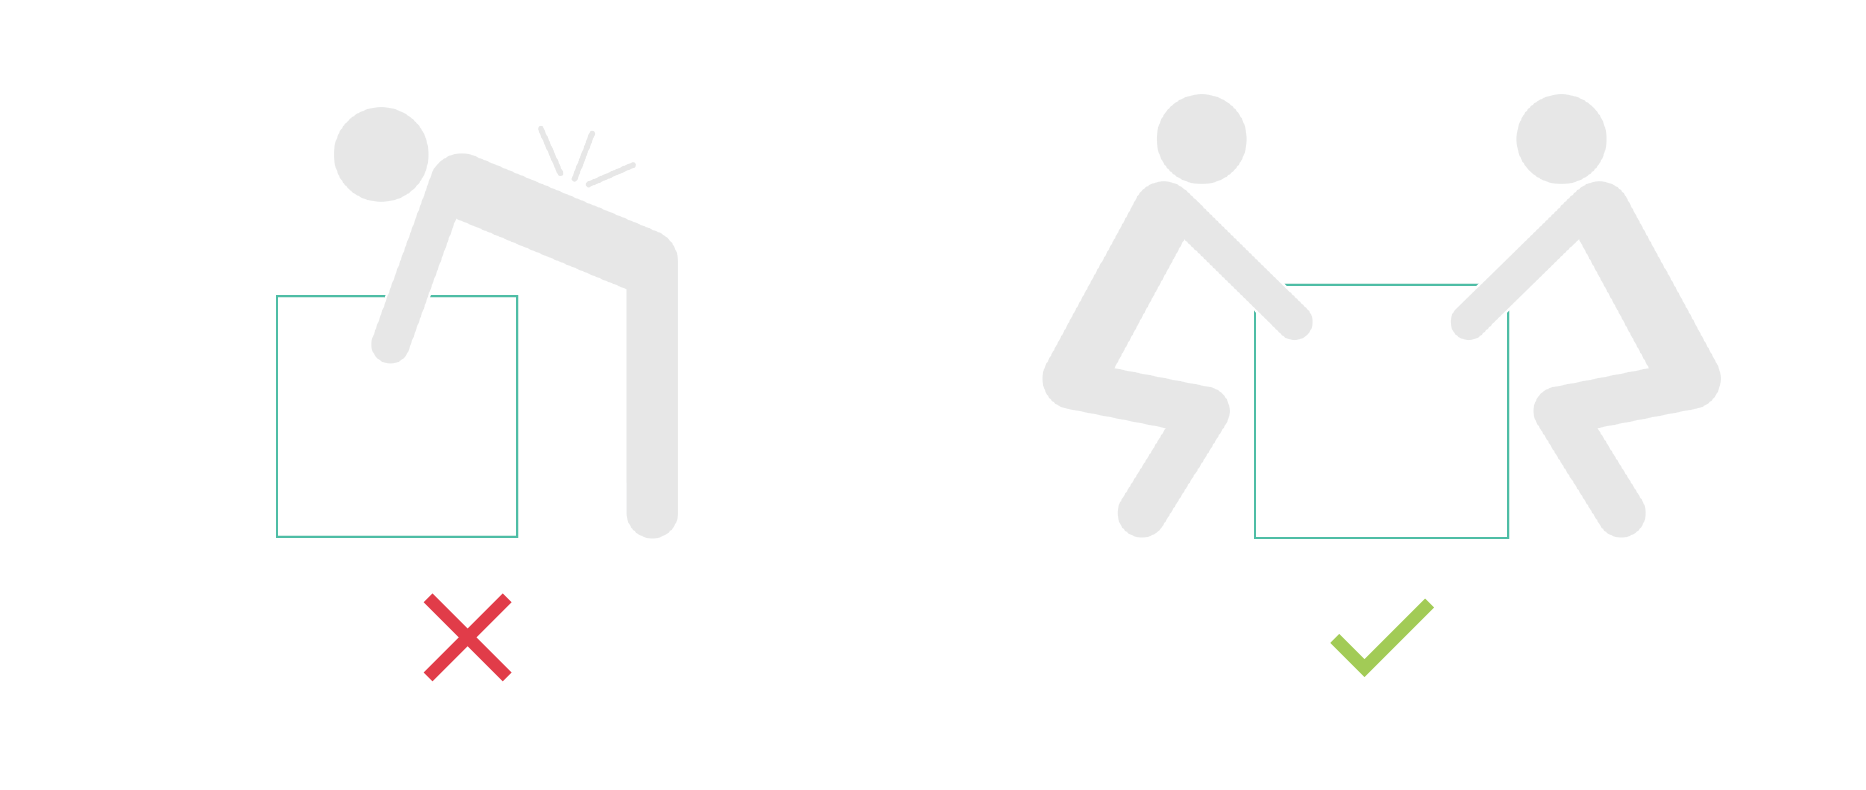
- Ask a helper to assist with the unpacking and assembly process.
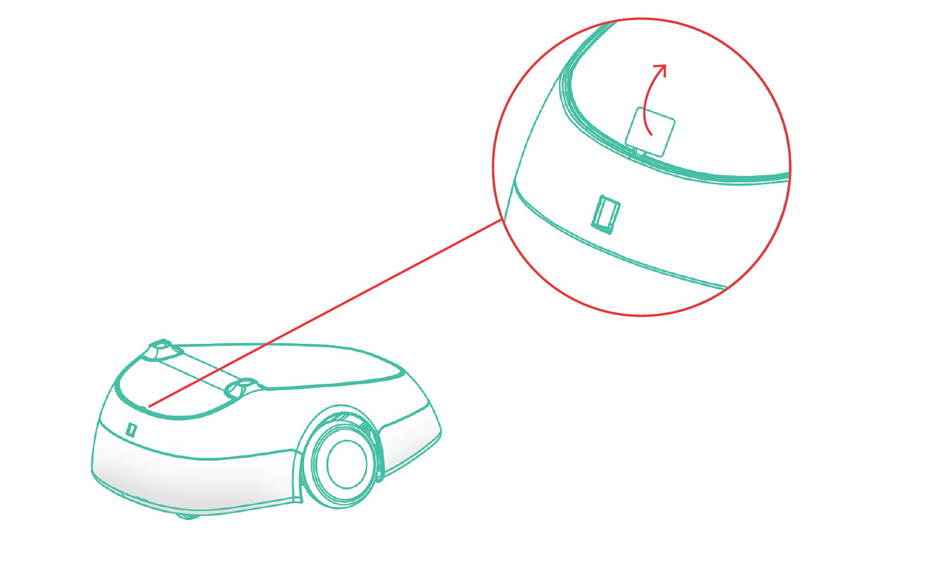
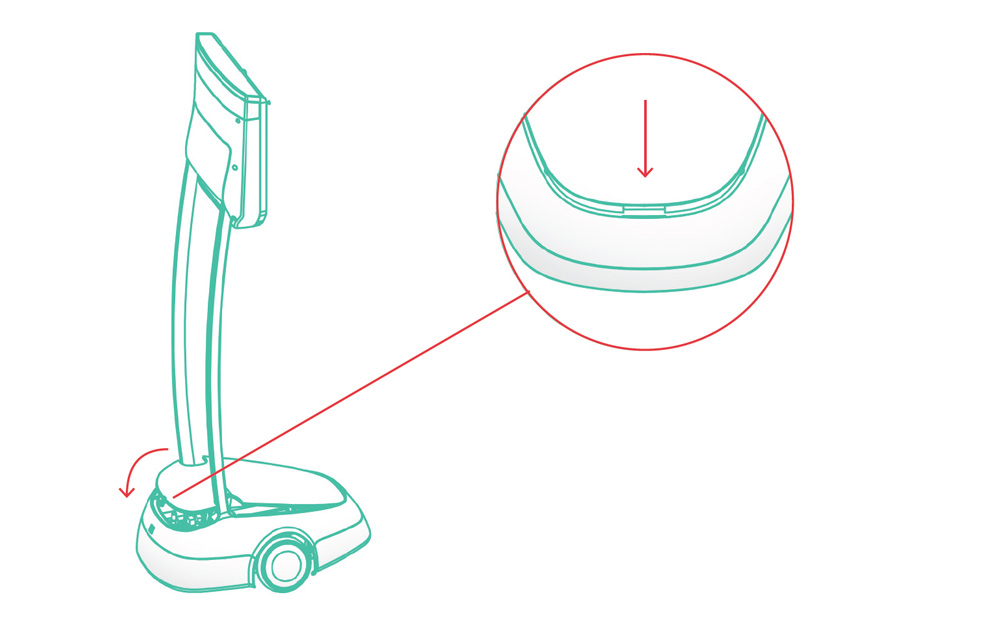
- Pull on the tag to open the Beam base lid. The tag may be discarded after use.
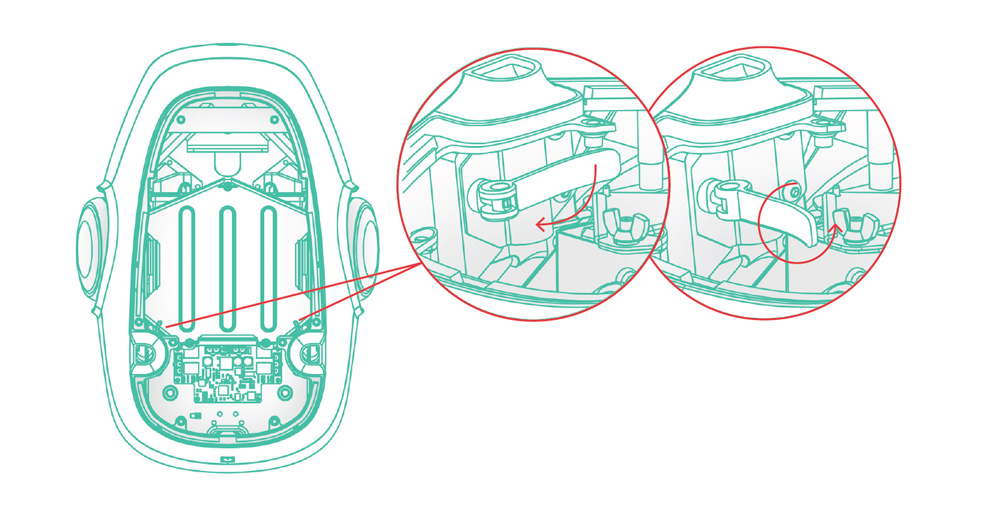
- Loosen the levers on both sides of the base.
- Align the Beam legs to each holder. One person should hold the head while another person feeds the wires into the base.
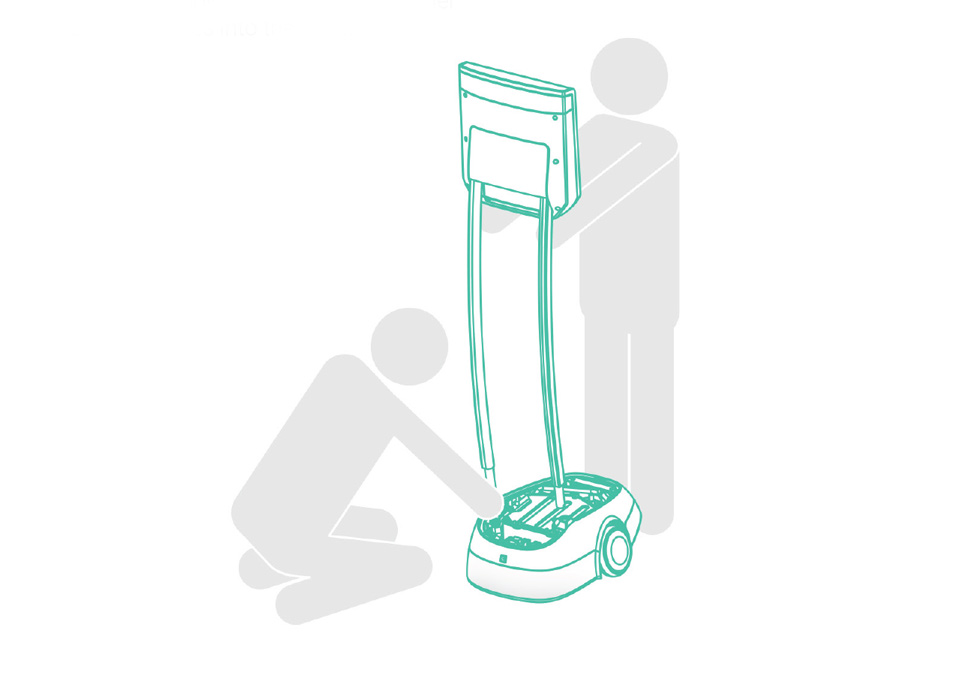
- Pull the wires through the holder. Then carefully slide the head piece down into place.
Note: Be careful to not pinch the wires.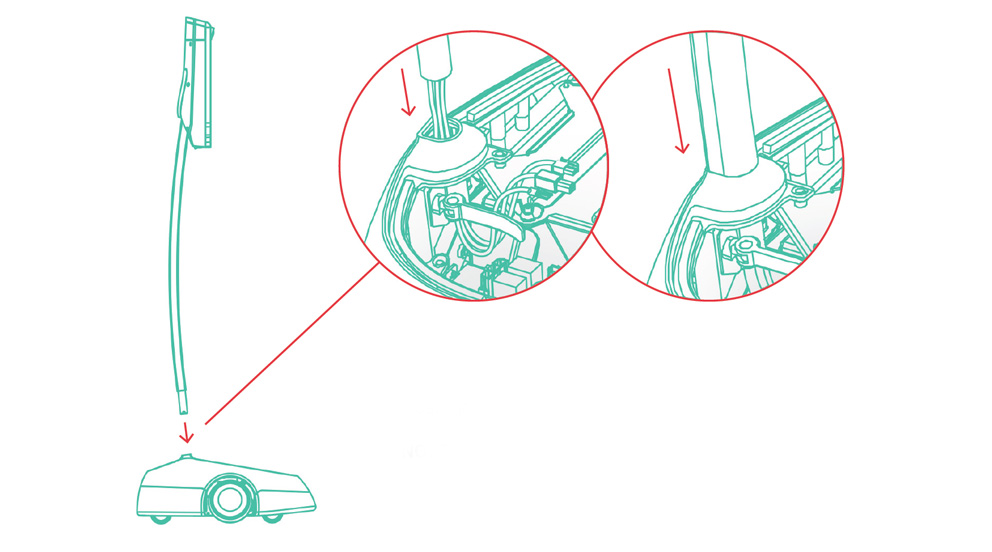
- Tighten the handles to secure the legs and head.
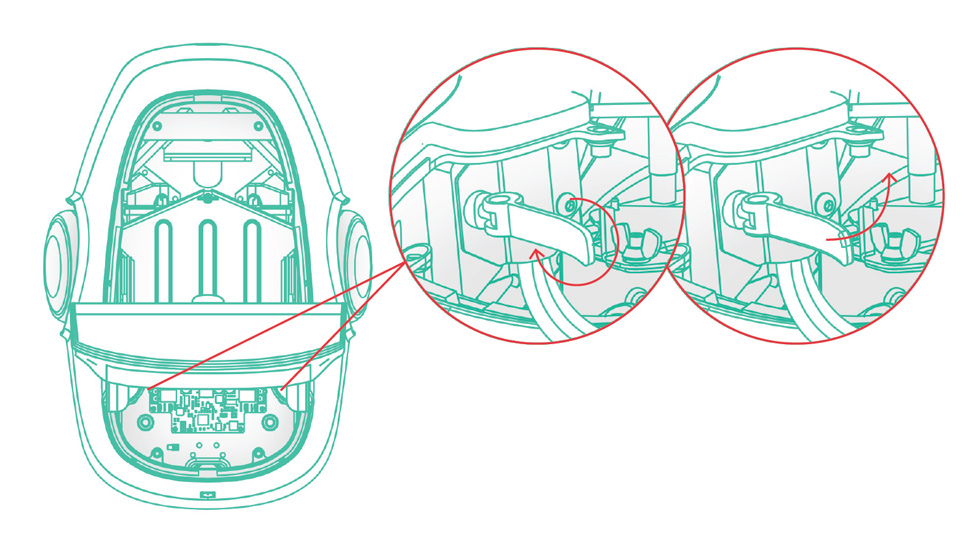
- Connect data and ground cables.
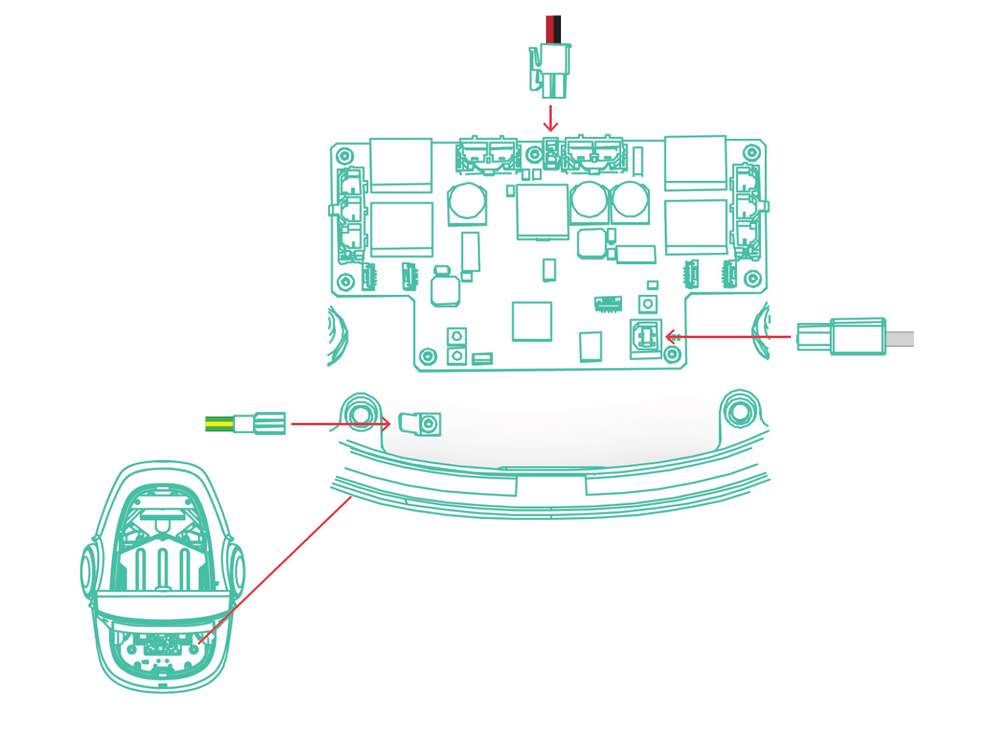
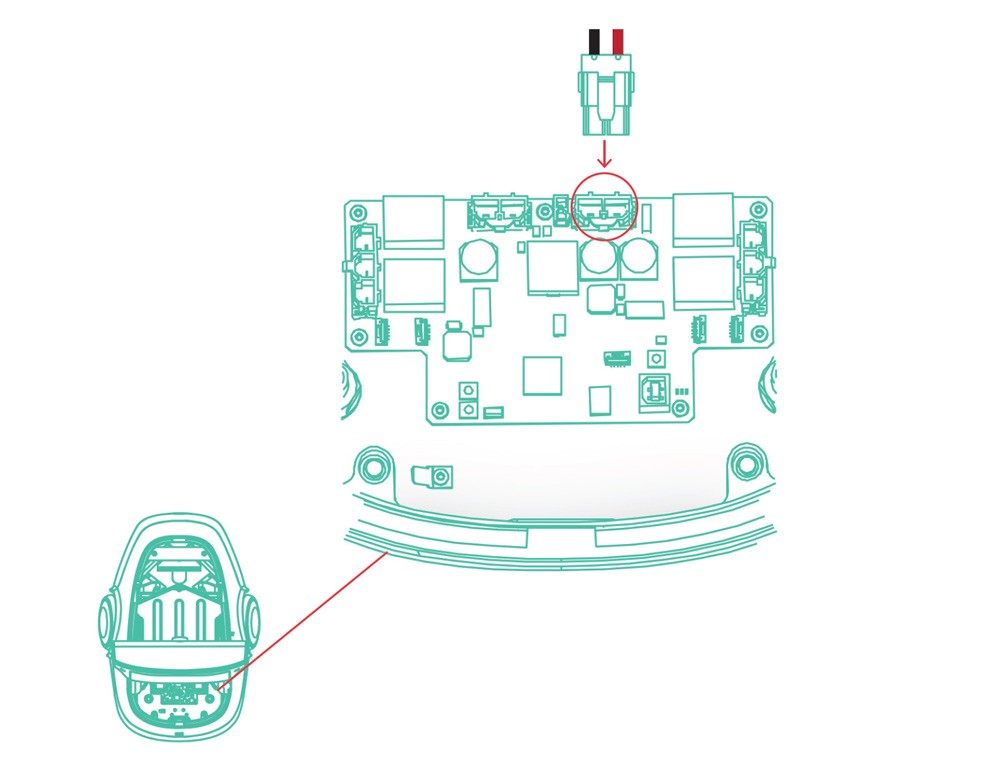
- Connect battery cable.
- Replace the base lid. Begin with front alignment, then lay rear into place.
- Press the button at the back of the base to power on the device. A booting jingle will sound.

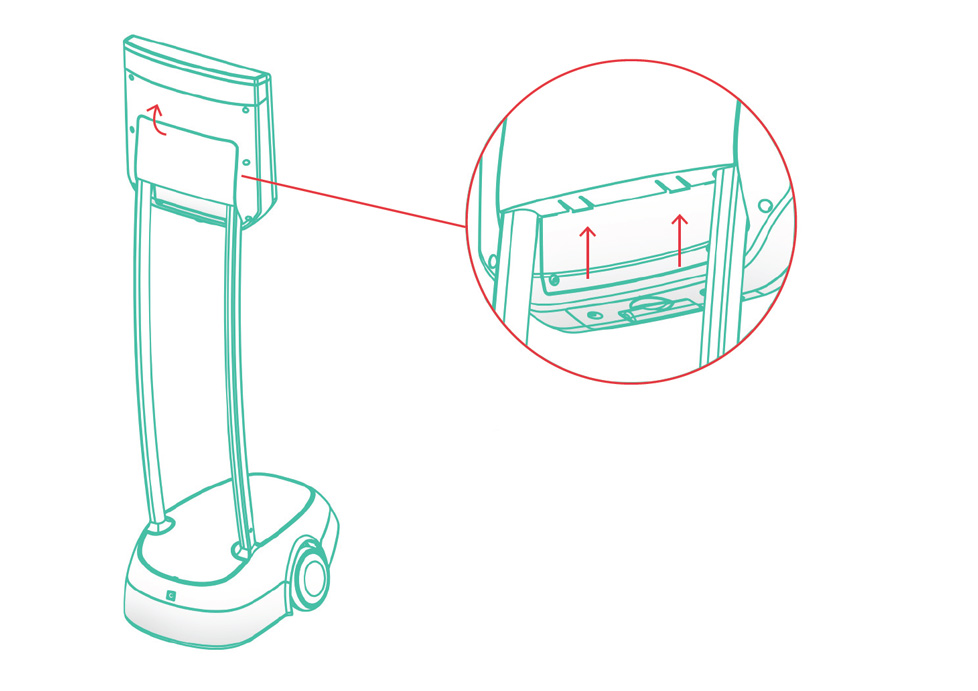
- At the back of the head, push and lift on the tabs near the bottom to remove the hatch.
- Insert a keyboard into the USB port, then follow the on-screen instructions.
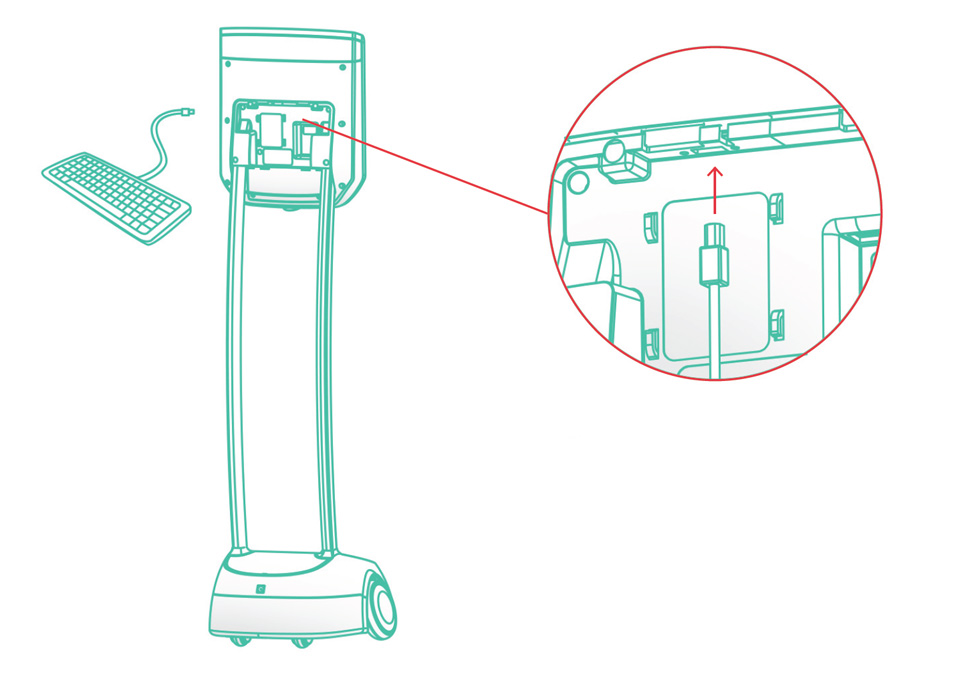
- When the setup is complete, remove the keyboard, reattach the hatch and remove the sticker.

- Connect the power cord to the back of the dock and into an outlet, then guide the BeamPro onto the dock. The light on the dock will turn green when the BeamPro is charging.
Note: Keep your Beam on the charging dock when not in use to avoid battery drainage. Click here for more information on long-term storage.

For additional information, email our Customer Success Department at This email address is being protected from spambots. You need JavaScript enabled to view it..
Tags: faq