Table of Contents
Overview
The Basic Beam Manager is used to manage Beam users and devices within your Beam Organization. To manage users and devices, you must be a Beam Administrator or have “can manage” access for your organization.
Logging In and Launching the Beam Manager
-
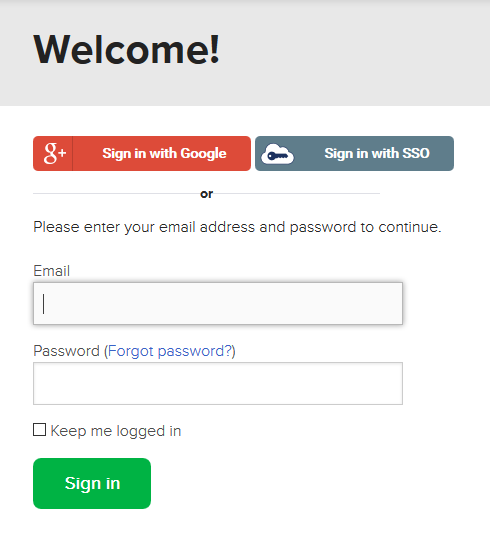
Browse to suitabletech.com and click “Login” in the top right corner.

-
Enter your Beam ID and password or click the “Sign in with Google” or “Sign in with SSO” button if you authenticate via another provider.
-
Beam Authentication uses Suitable infrastructure to authenticate credentials.
-
Enter your email address and password in the fields provided
-
Select Sign In
-
Upon successful authentication, your Beam application will open to your Beam Lobby.
-
-
Sign in with Google is only available to users with Gmail or Google for Business.
-
Click Sign in with Google
-
A new window will open to view your Google Accounts
-
Select the associated account to sign in
-
Upon successful authentication, your Beam application will open to your Beam Lobby
-
-
Sign in with SSO is available to users who authenticate via SSO.
-
Click Sign in with SSO
-
A new browser window will open to the Suitable Technologies Welcome page
-
Upon successful authentication, your Beam application will open to your Beam Lobby
-
-
-
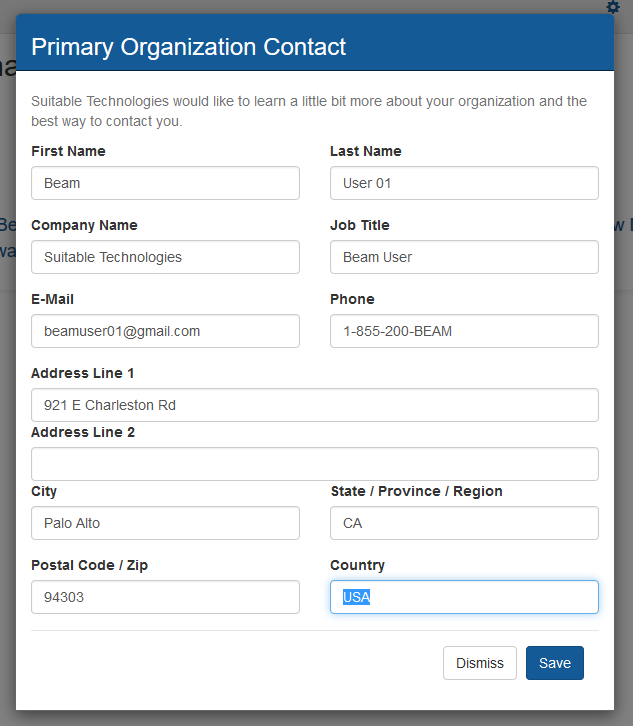
If this is the first time you’ve signed in, you will need to enter information about yourself and your Beam Organization
-
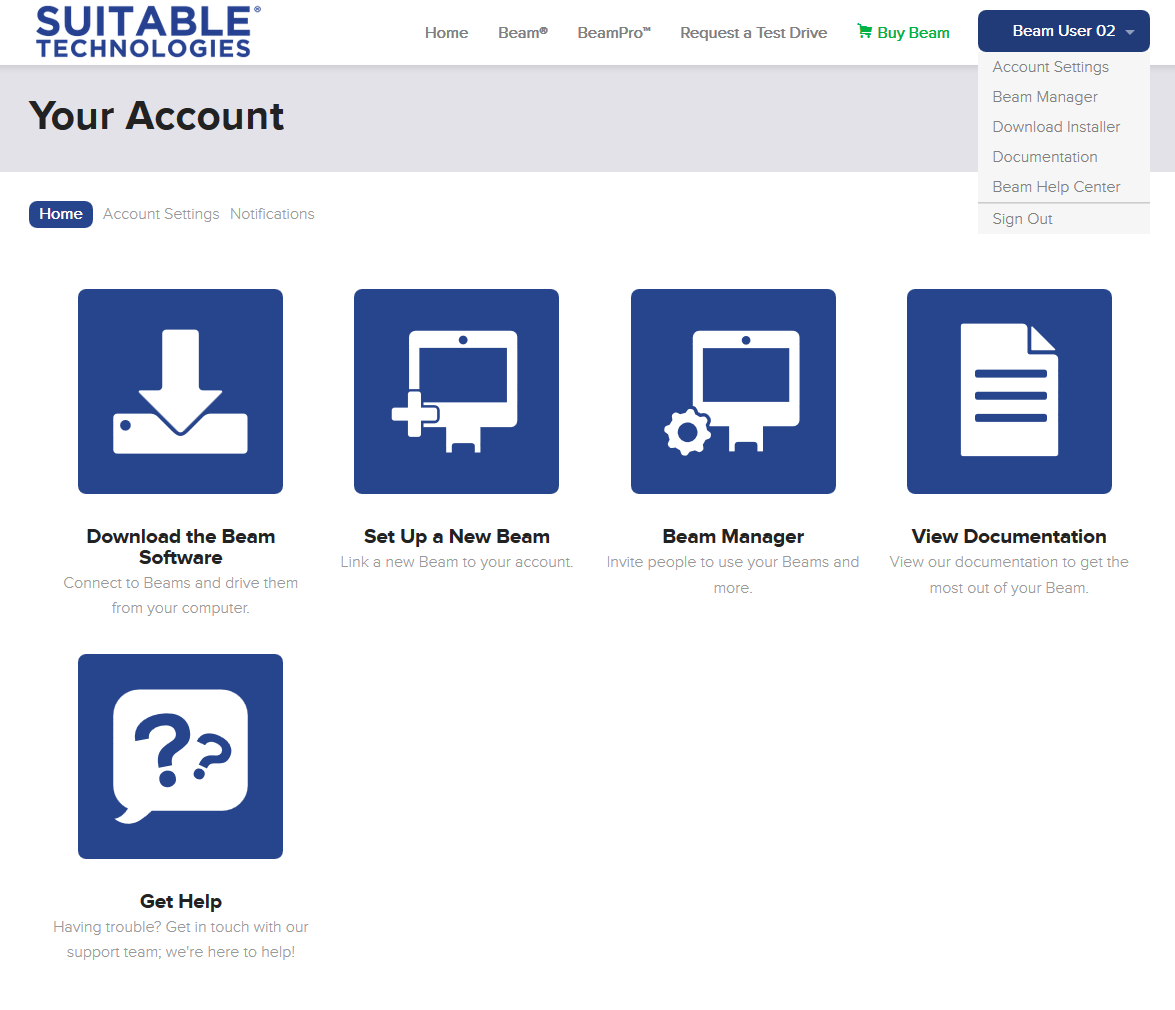
Once logged in, click the button with your name in the top right corner to open the user menu and click “Beam Manager” or click on the “Beam Manager” button on your account home page.
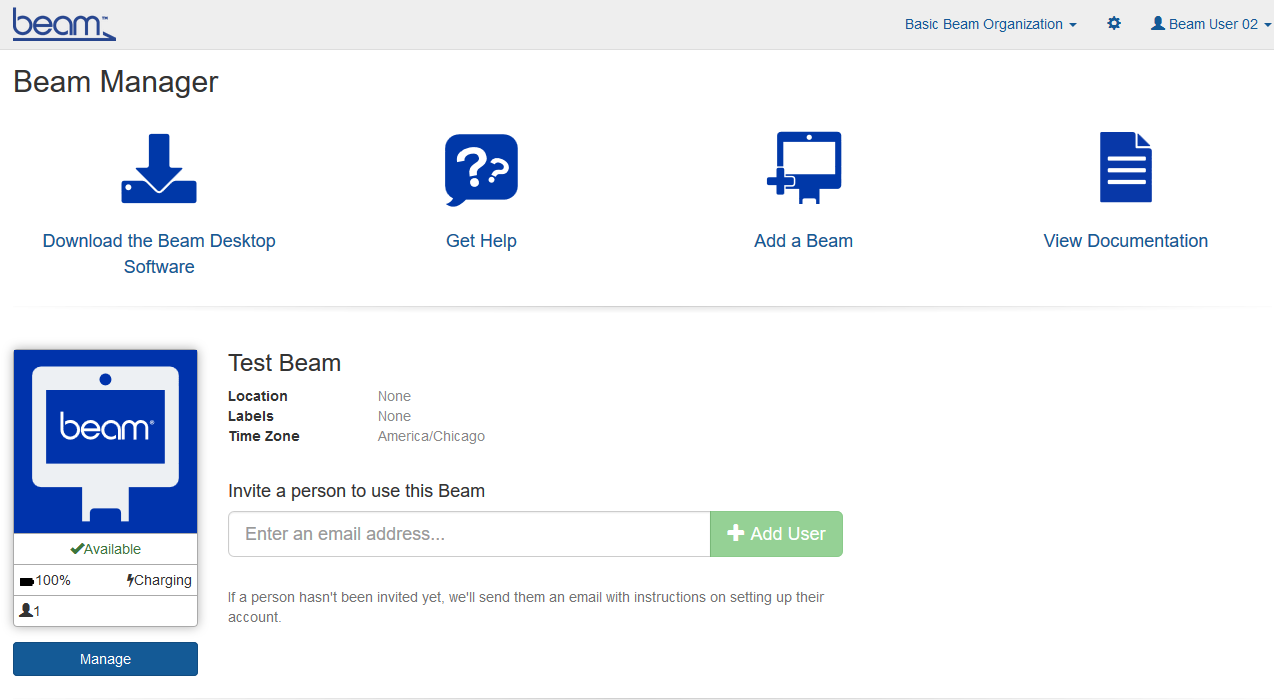
Beam Manager Dashboard
The starting point for managing your Beams and Beam Users.
Note: If you are an administrator for multiple organizations, you can choose the organization for which you want to make changes from a drop-down list in the upper-right corner of the application.
-
See the links to various tools available to Beam Administrators.
-
Download Beam Desktop App: Download the latest version of the Beam desktop application
-
Get Help: Visit the Beam Support Site
-
Add a Beam: Link a new Beam to your Account
-
View Documentation: Visit the Beam instructions and documentation site
-
Inviting a New Beam User
Invite someone to use your Beam.
-
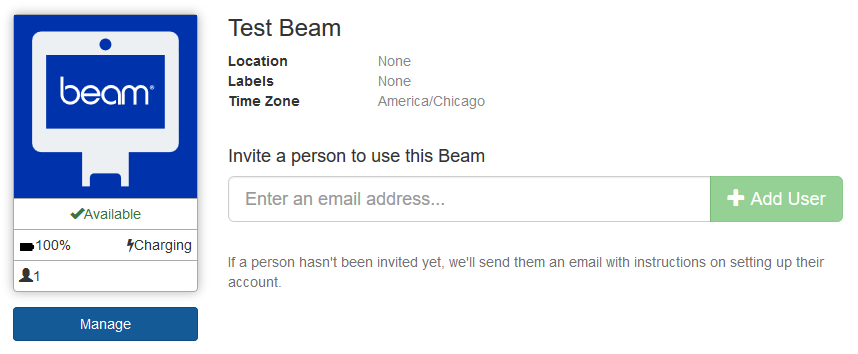
From the Beam Manager dashboard, locate the Beam you want to invite a Beam User to use.
-
Locate the invitation form and add your contact’s email address

-
Click “Add User” to complete the invitation.
-
Invited users will be notified via email with the following information:
-
Who invited them.
-
Which device groups/devices they can access.
-
Their user name.
-
A link to create a password and get the Beam application.
-
-
After sending the invitation, the user will be added to your organization.
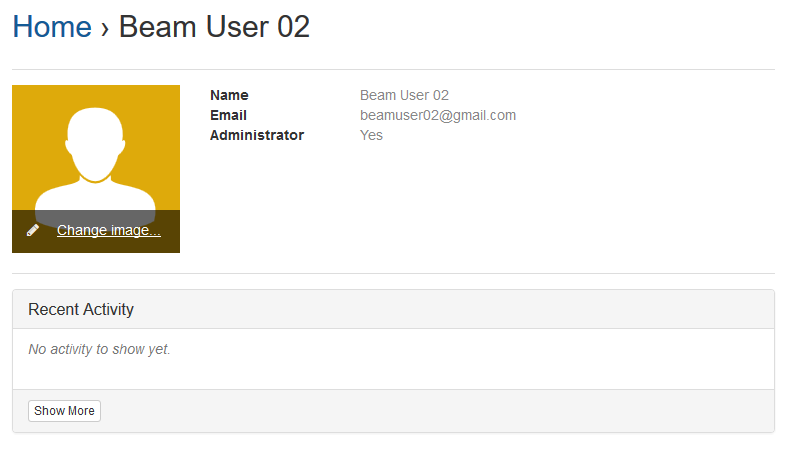
Customizing a Beam User’s Profile Image
To change a Beam User’s profile image, see the steps below.
-
From the Beam Management Page, make sure the “Manage Access” tab is in focus.
-
Locate the person whose profile image you want to edit, and click it.

-
Hover your cursor over the current profile image to view the “Change image…” link. Highlight and click to proceed.
-
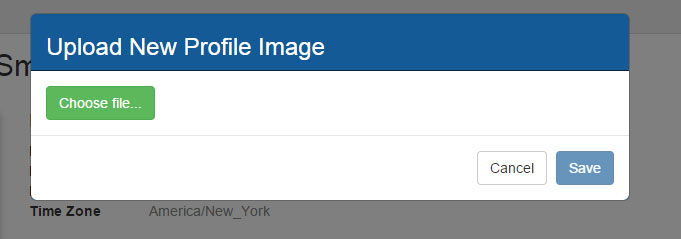
Once clicked, a form appears, click on the “Choose file” button.

-
A file browser window appears showing your system’s directory. Locate any .jpg, .png or gif file that is less than 2MB in size.
-
Click on the open button (lower right hand corner).
-
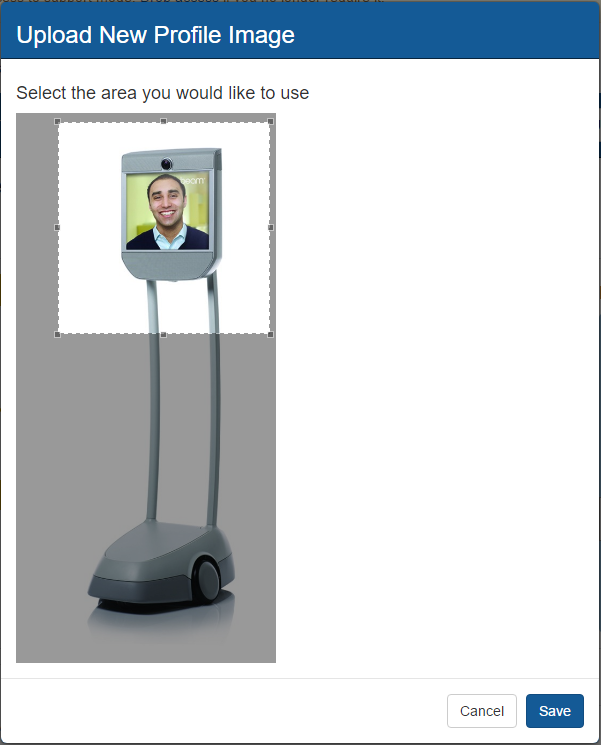
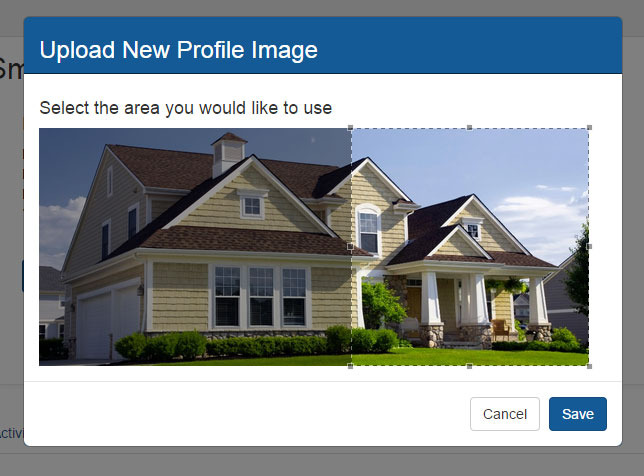
Your image will load into a cropping tool. Use the controls to select the area of the image you’d like to use.
-
Once you’re happy with the results, click on the “Save” button.
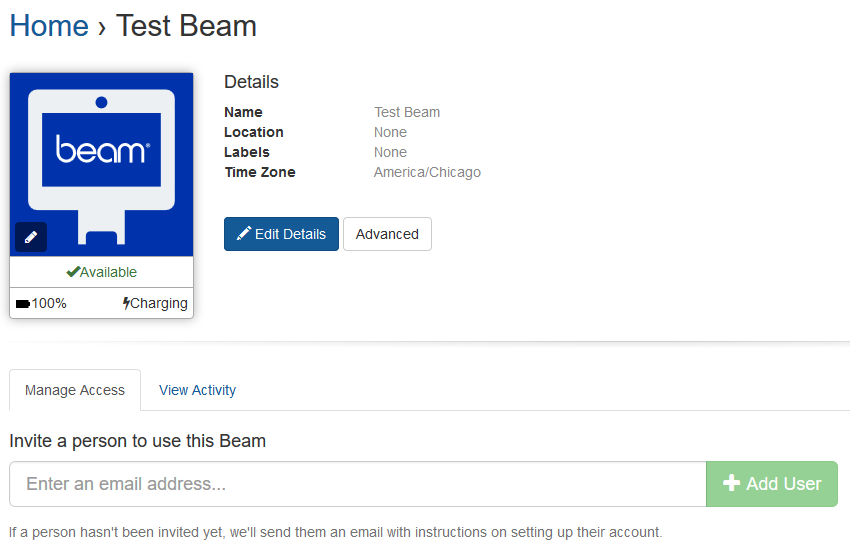
Managing Your Beam
See below for the steps to edit your Beam’s Details:
-
From the Beam Information Page, click the “Manage” button below the Beam Info Section.

-
Once clicked, you’ll be taken to the Beam’s management page.

-
By default, anyone you invite to call your Beam will need to have that call answered by someone near the Beam or a Beam Administrator. If you would like, you can give a person the ability to automatically connect to your Beam, without the need for the call to be answered. Locate the “Auto-connect” column and put a check mark in the field

-
If you want to allow others to manage your Beam, put a checkmark in the “Can manage” column.
-
To remove a user, locate the person who you wish to remove in the list and click on the “Remove Person” button to the far right.
-
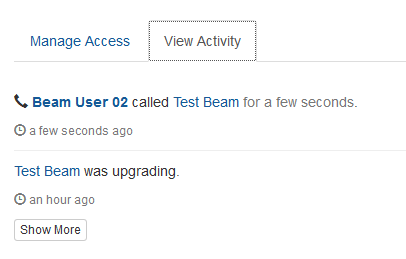
To view recent activity on a Beam, click on the “View Activity” tab.
-
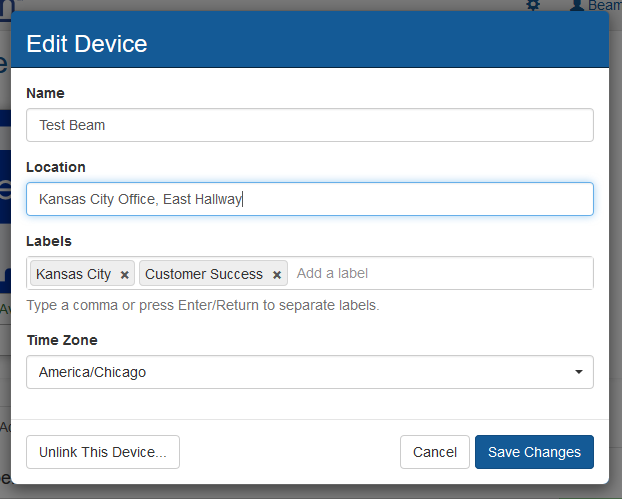
To edit your Beam’s details, click on the Edit Details Button from the Beam Management page.
-
Once clicked, a form will appear with entries for each detail that can be modified.
-
Beam Name: Set the Name of your Beam. This name is visible on the Beam App, and in the Beam Management Tool. This is a required field and cannot be left blank.
-
Location: A brief description of the Beam’s location. “New York, NY” or “Bill’s House” for example.
-
Labels: Labels (or tags) are short single word descriptions that help make the Beam easier to search. E.g. “Bill”, “Personal”, “Upstairs”, etc.
-
Time Zone: Locate the nearest city to your Beam’s location to set the correct local time for it.
-
-
Once you are happy with your changes, click on the Save Changes button, you can also revert any changes you’ve made by clicking on the cancel button.
Note: In the event you need to unlink a Beam from your organization (perhaps to sell it to another party), click on the “Unlink this Device…” button and confirm the removal.
-
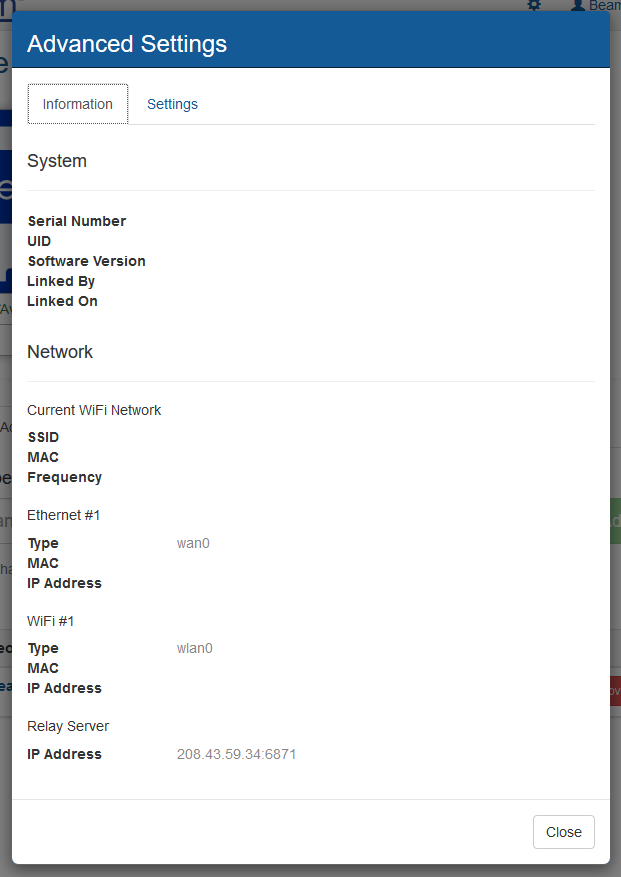
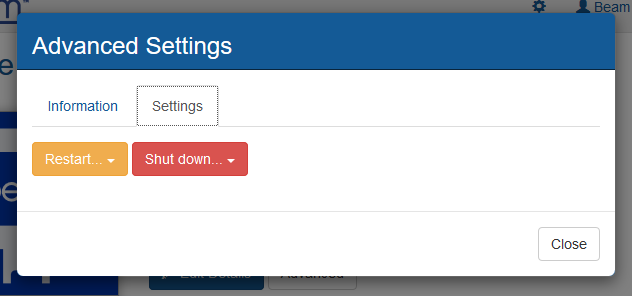
Click on the “Advanced” Button to display information unique to this Beam like MAC address or serial number or to remotely restart or shut down the Beam.
Changing Your Beam’s Profile Image
See below for the steps to change the profile image of your Beam:
-
From the Beam Management page, hover your cursor over the current profile image to view the “Change image…” link. Highlight and click to proceed.

-
Once clicked, a form appears, click on the “Choose file” button.
-
A file browser window appears showing your system’s directory, locate any .jpg, .png or gif file that is less than 2MB in size.
-
Click on the open button (lower right hand corner)
-
Your image will load into a cropping tool. Use the controls to choose which section of the image to use.
-
Once you’re happy with the results, click on the “Save” button.
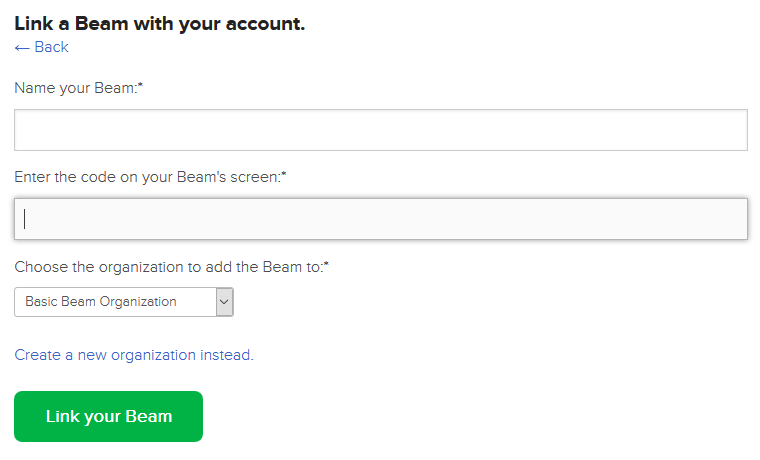
Adding Another Beam to Your Organization
Follow the instructions below to link a newly acquired Beam to your existing Beam organization.
-
From the Beam Management Tool Main Menu, locate and select the “Add a Beam” button.
-
Once clicked, a form appears. Locate and input the Linking Code that appears on the Beam you want to add to your account.
-
Click on “Link your Beam” to complete the process.
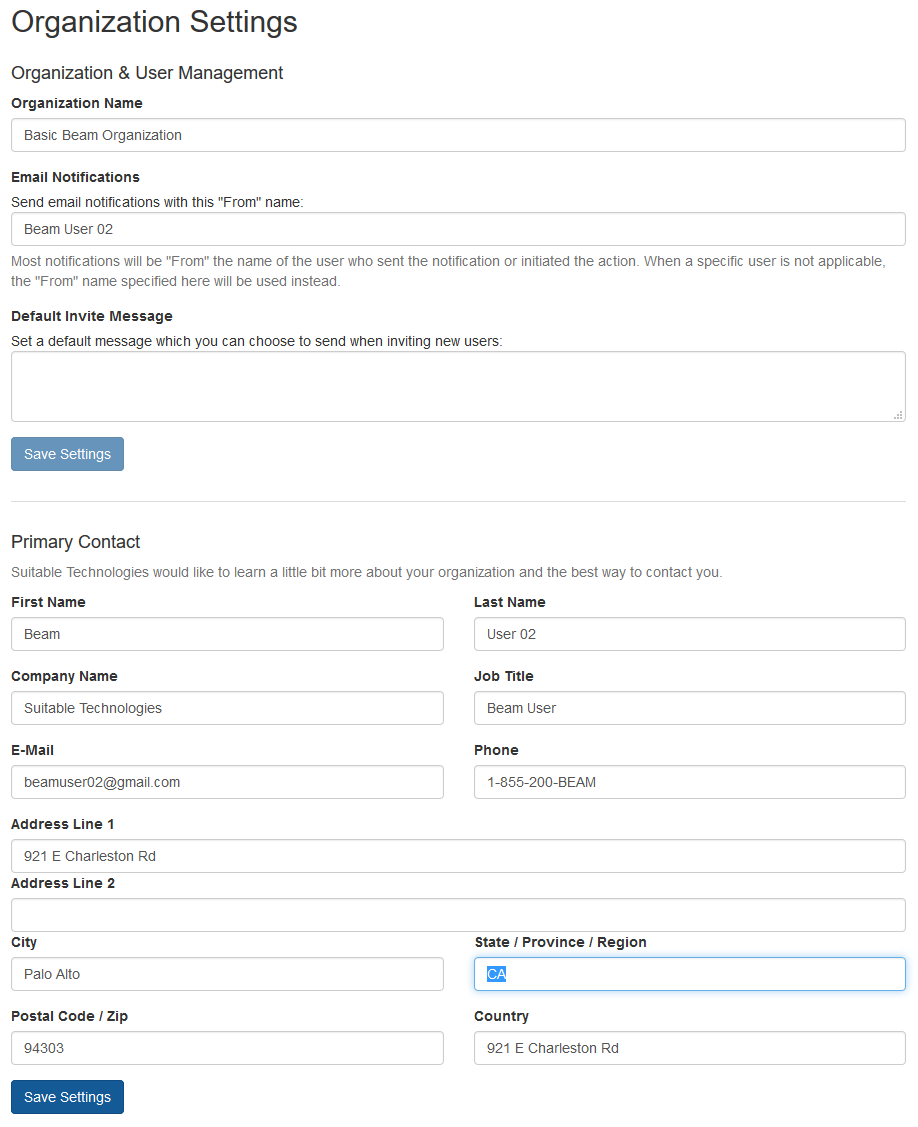
Organization Settings
To change the details about your Beam Organization, see below.
-
Locate and click on the gear icon in the upper right of the Beam Manager page.